Settings
It's a section where you would be able to set up all the super admin functions that are not available for the other user roles. A super admin would be able to set up Global settings, Categories, Status, Priorities, Departments, Types, Languages, Email Templates, Mail(SMTP), and Pusher settings. This section would be able to find the left sidebar's Settings menu.
Global Settings
It's a page where you can change the App name, default language, Email notifications, etc. You can find the Global Settings page on the following admin link. http://website.com/dashboard/settings/global
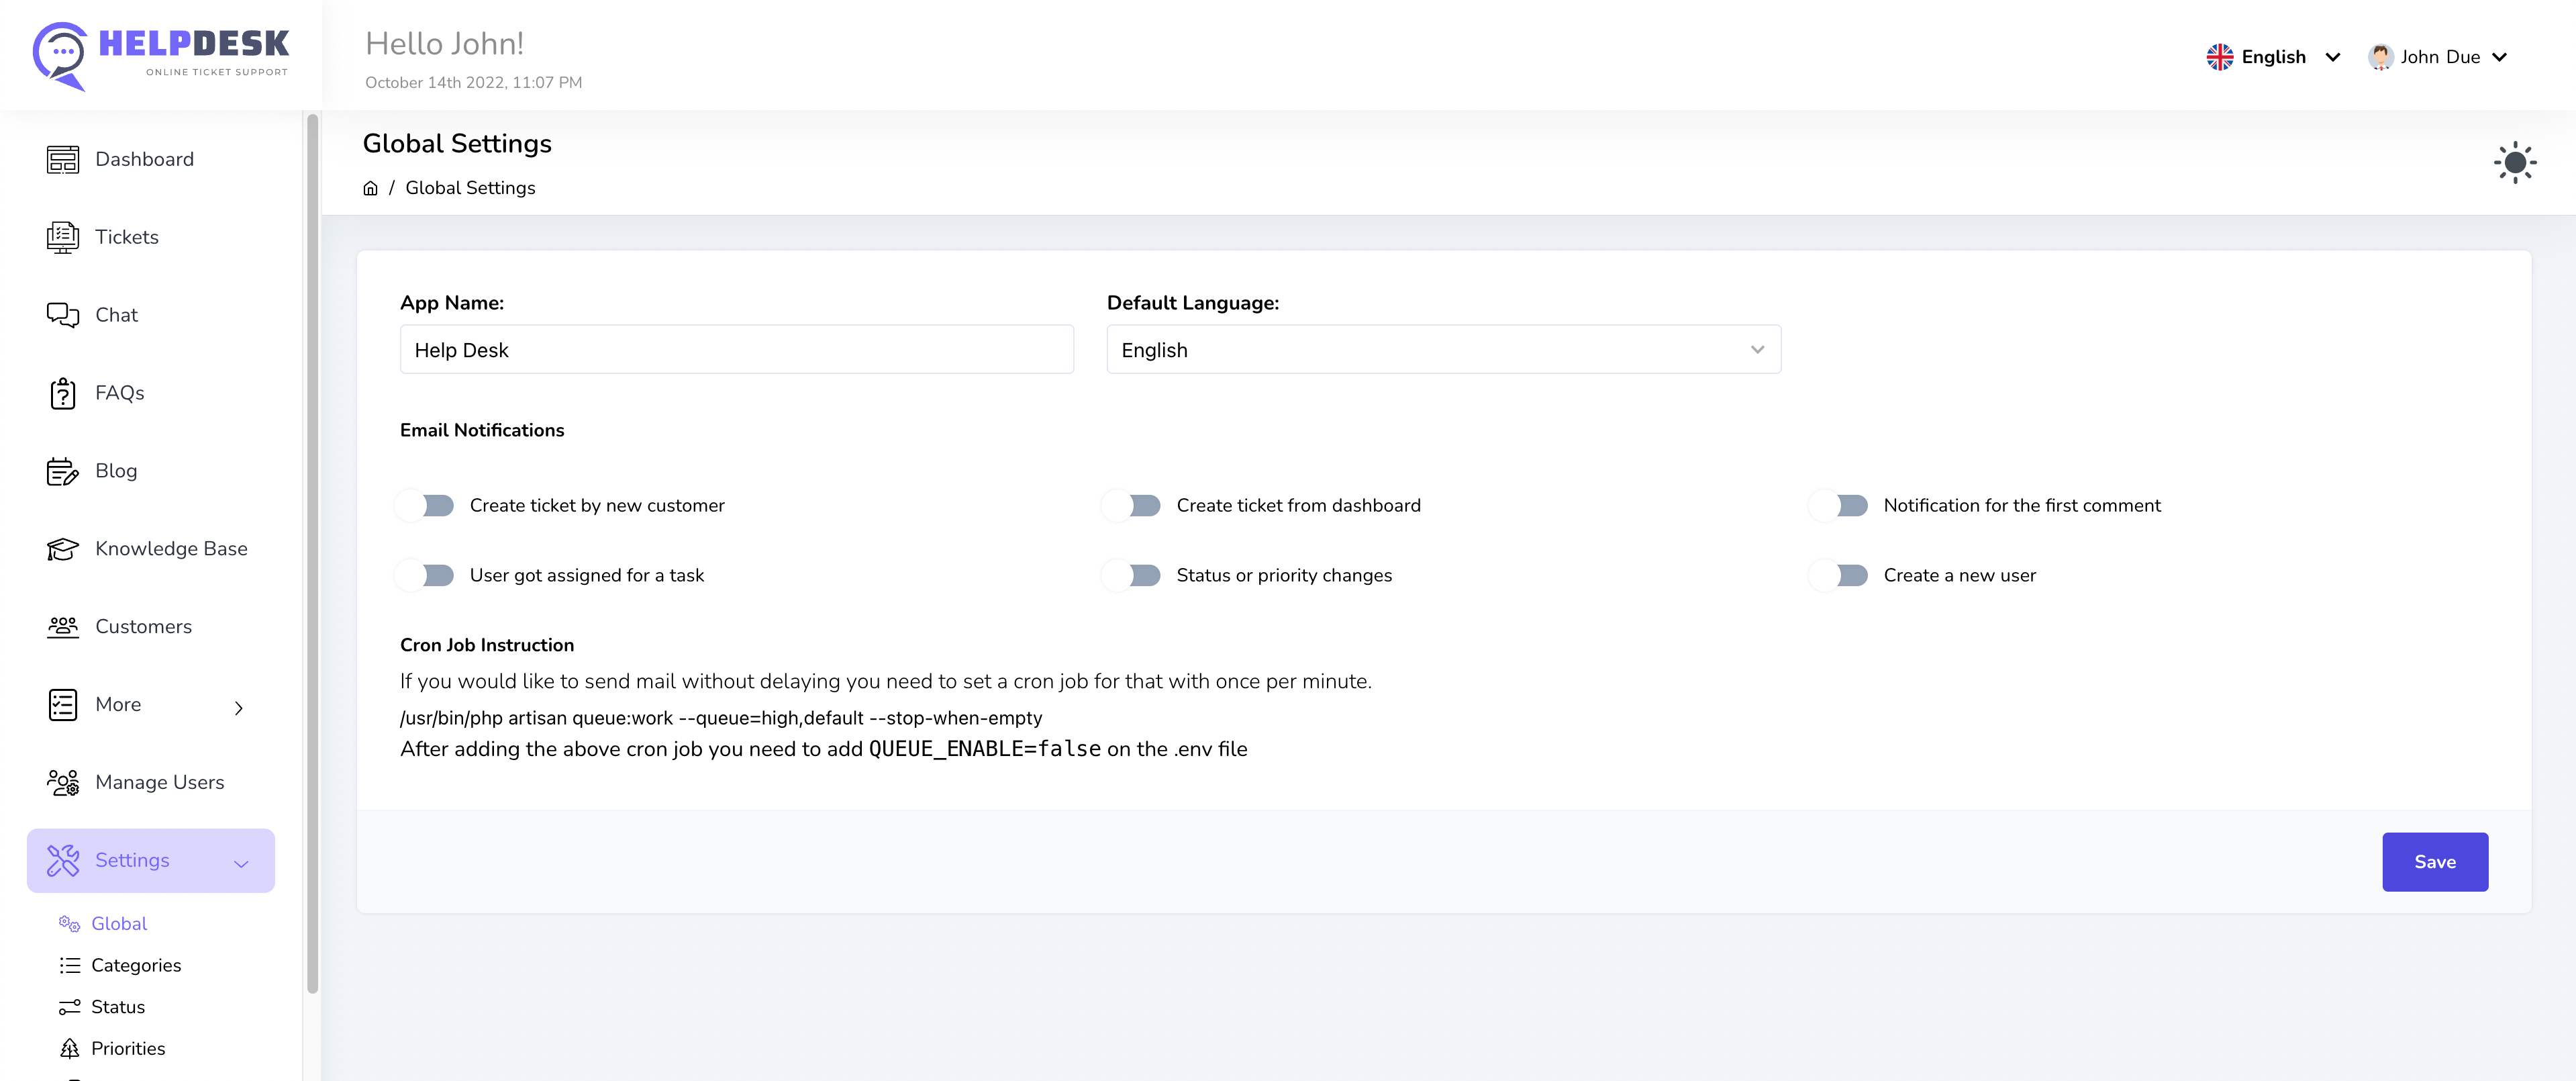
App Name
You can define your application name here. Every application has its name. In that case, this script is named HelpDesk. If you want to customize that name as yours, you can set it up here.
Default Language
This application has support for multiple languages. By default, each user login to this application will see the language in English. You can set your desired language here if you want to change that default language.
Email Notifications
Suppose you want to get email notifications for particular actions. It would help if you used this option. You will see options with the On/Off radio button on the above page example. On switch, the option is defined as green on the right side of the slide, and Off is defined as the left side with gray color. Clicking those On/Off buttons will make email notifications be enabled/disabled.
Cron Job Setup for sending email
This features is enable you sending mail with queue system where you don't need wait to get recipient mail in delay. The cron job will do that task one by one.
You need to do the following to achieve this feature
- Add the following task to your cron job.
/usr/bin/php artisan queue:work --queue=high,default --stop-when-empty - After adding the above cron job you need to add
QUEUE_ENABLE=falseon the .env file
*** You need to click on the Save button to save the settings.
Categories
Categories are use to define tickets with different classes. Different tickets can be different category types. Also, a category can have multiple tickets.
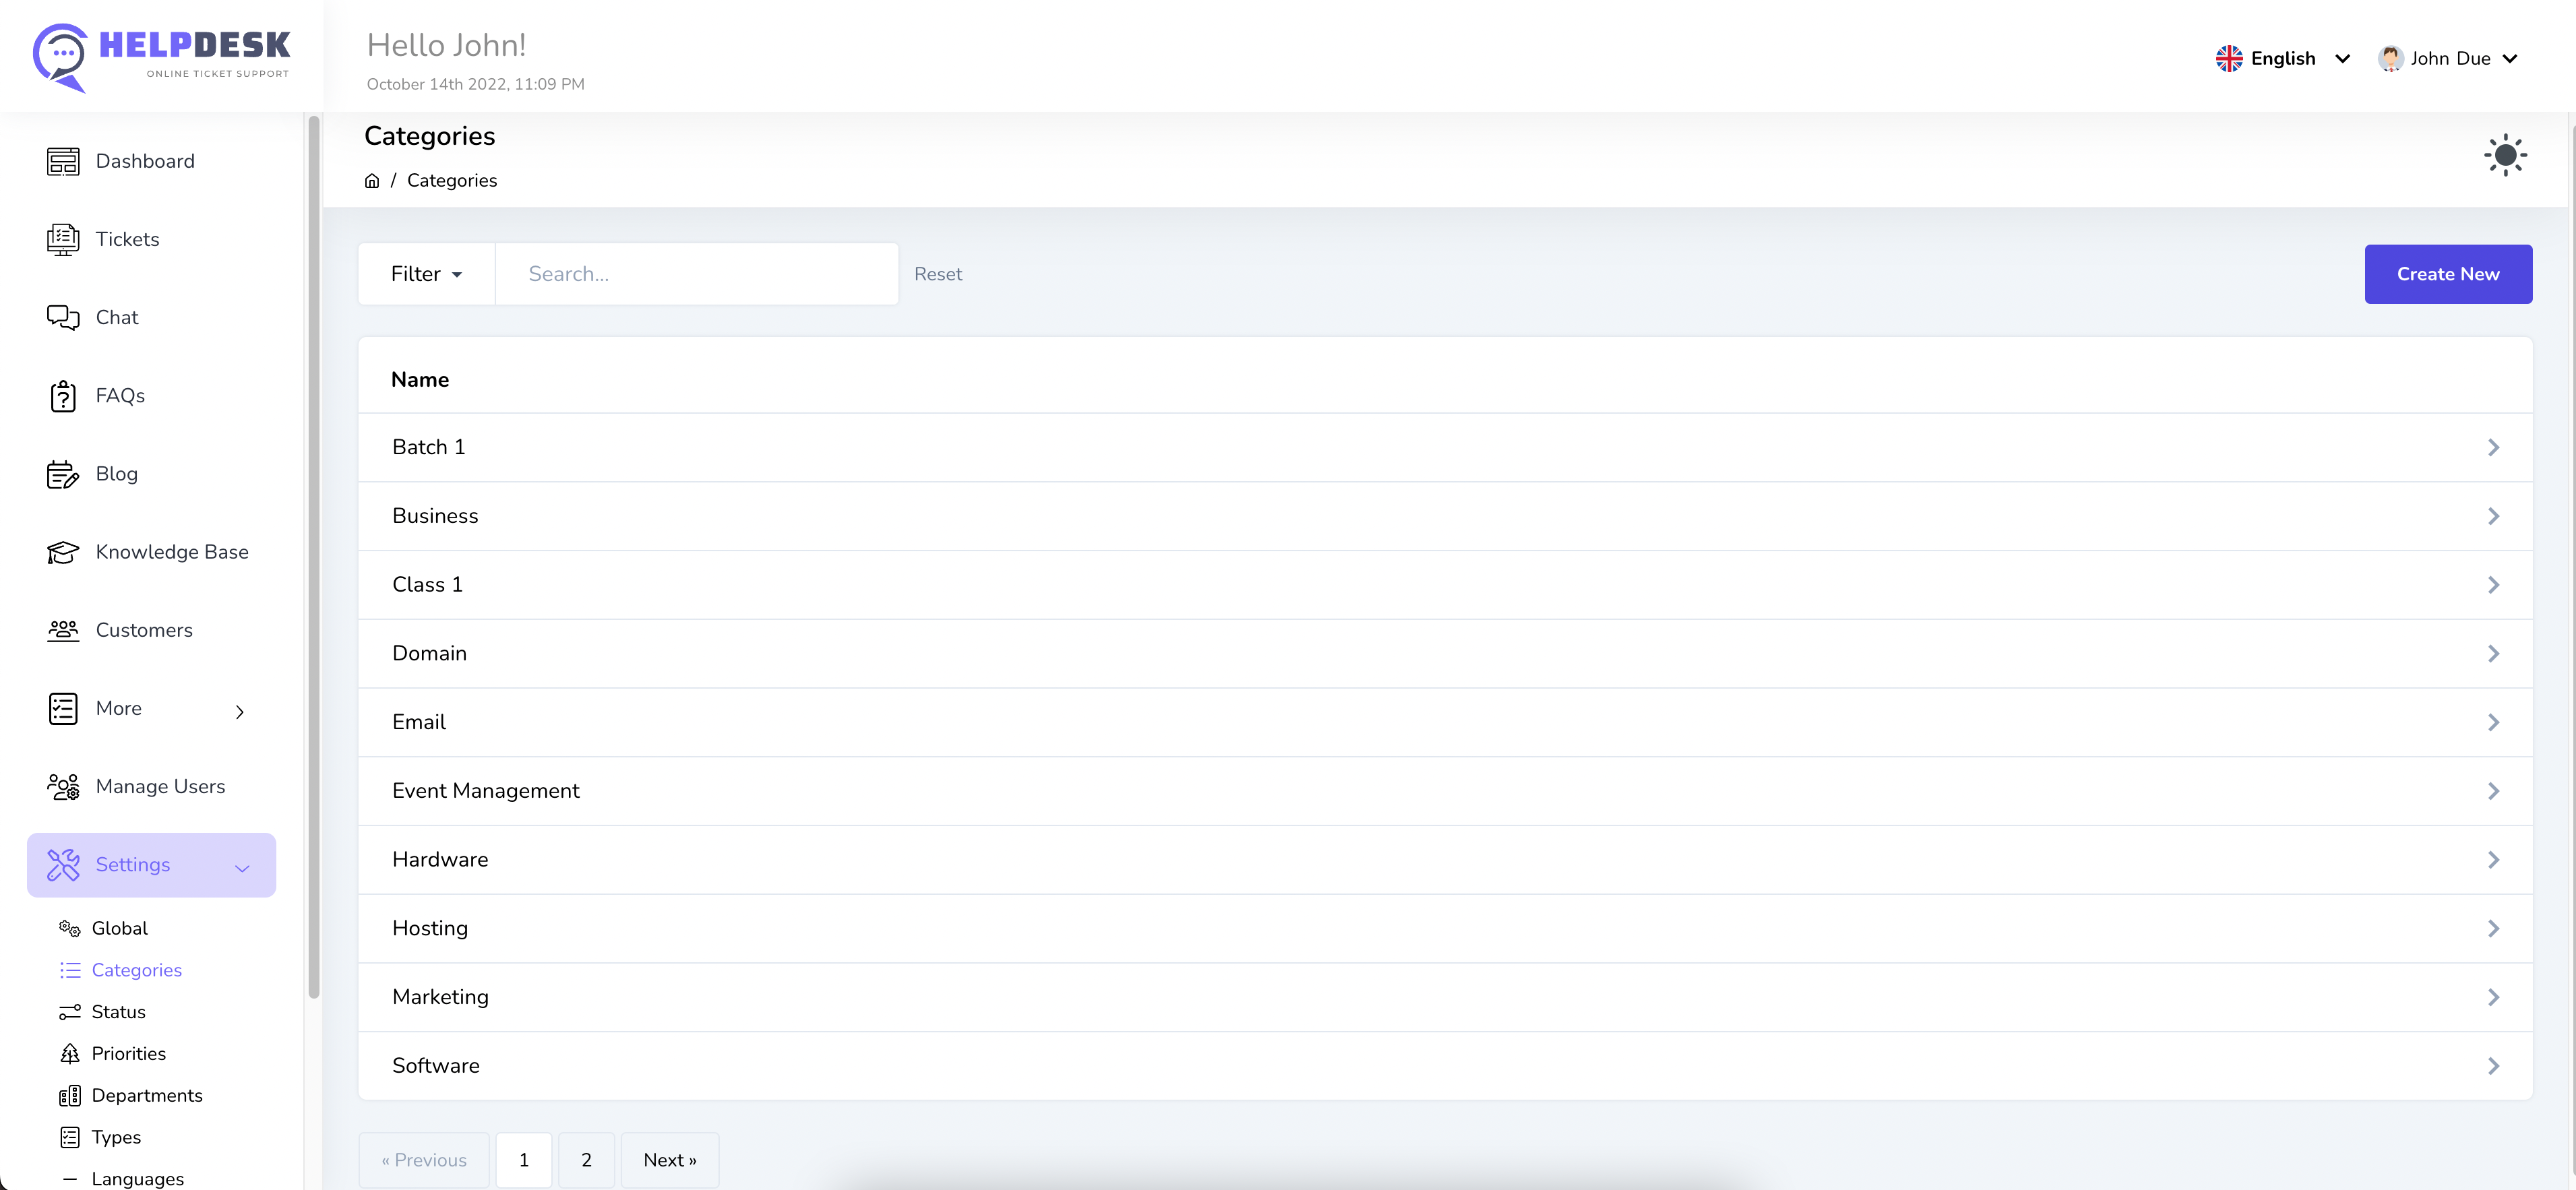
You can manage categories from the your_site/dashboard/settings/categories page
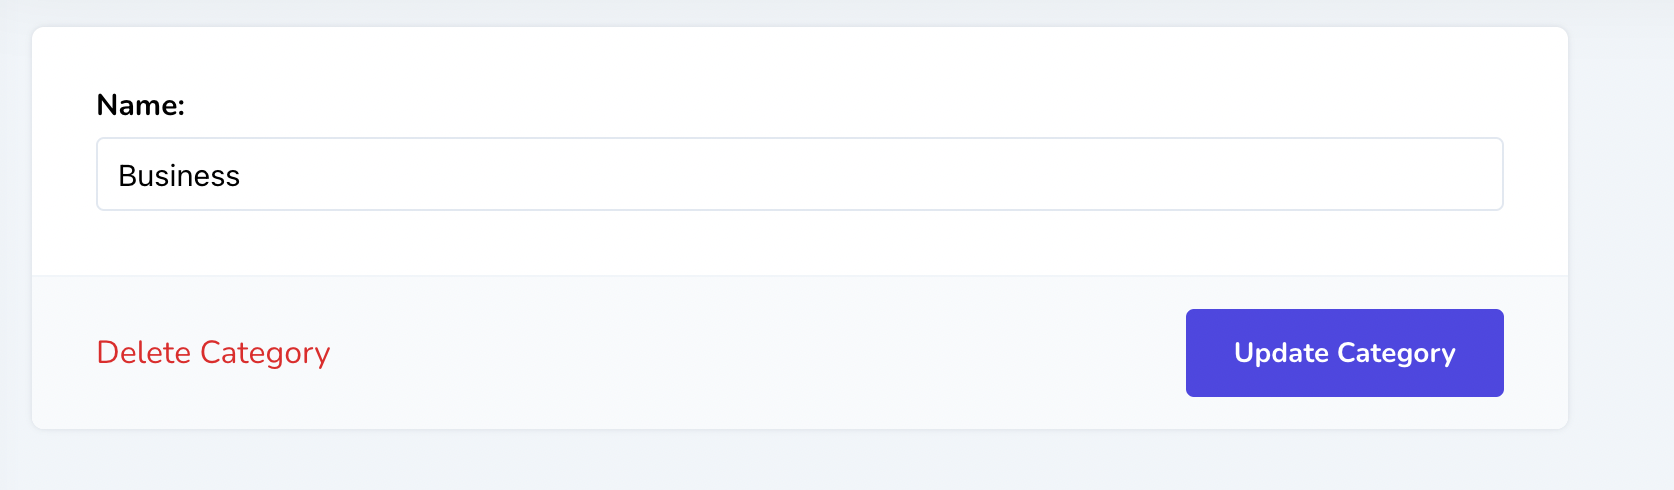
You will see the above screen if you click on the specific category. You can delete category with clicking delete category link or update category after modifying that.
Status
Status is use for the current states of the tickets. There are some predefined status items on the following example bellow. You can change those as your own if you want to.
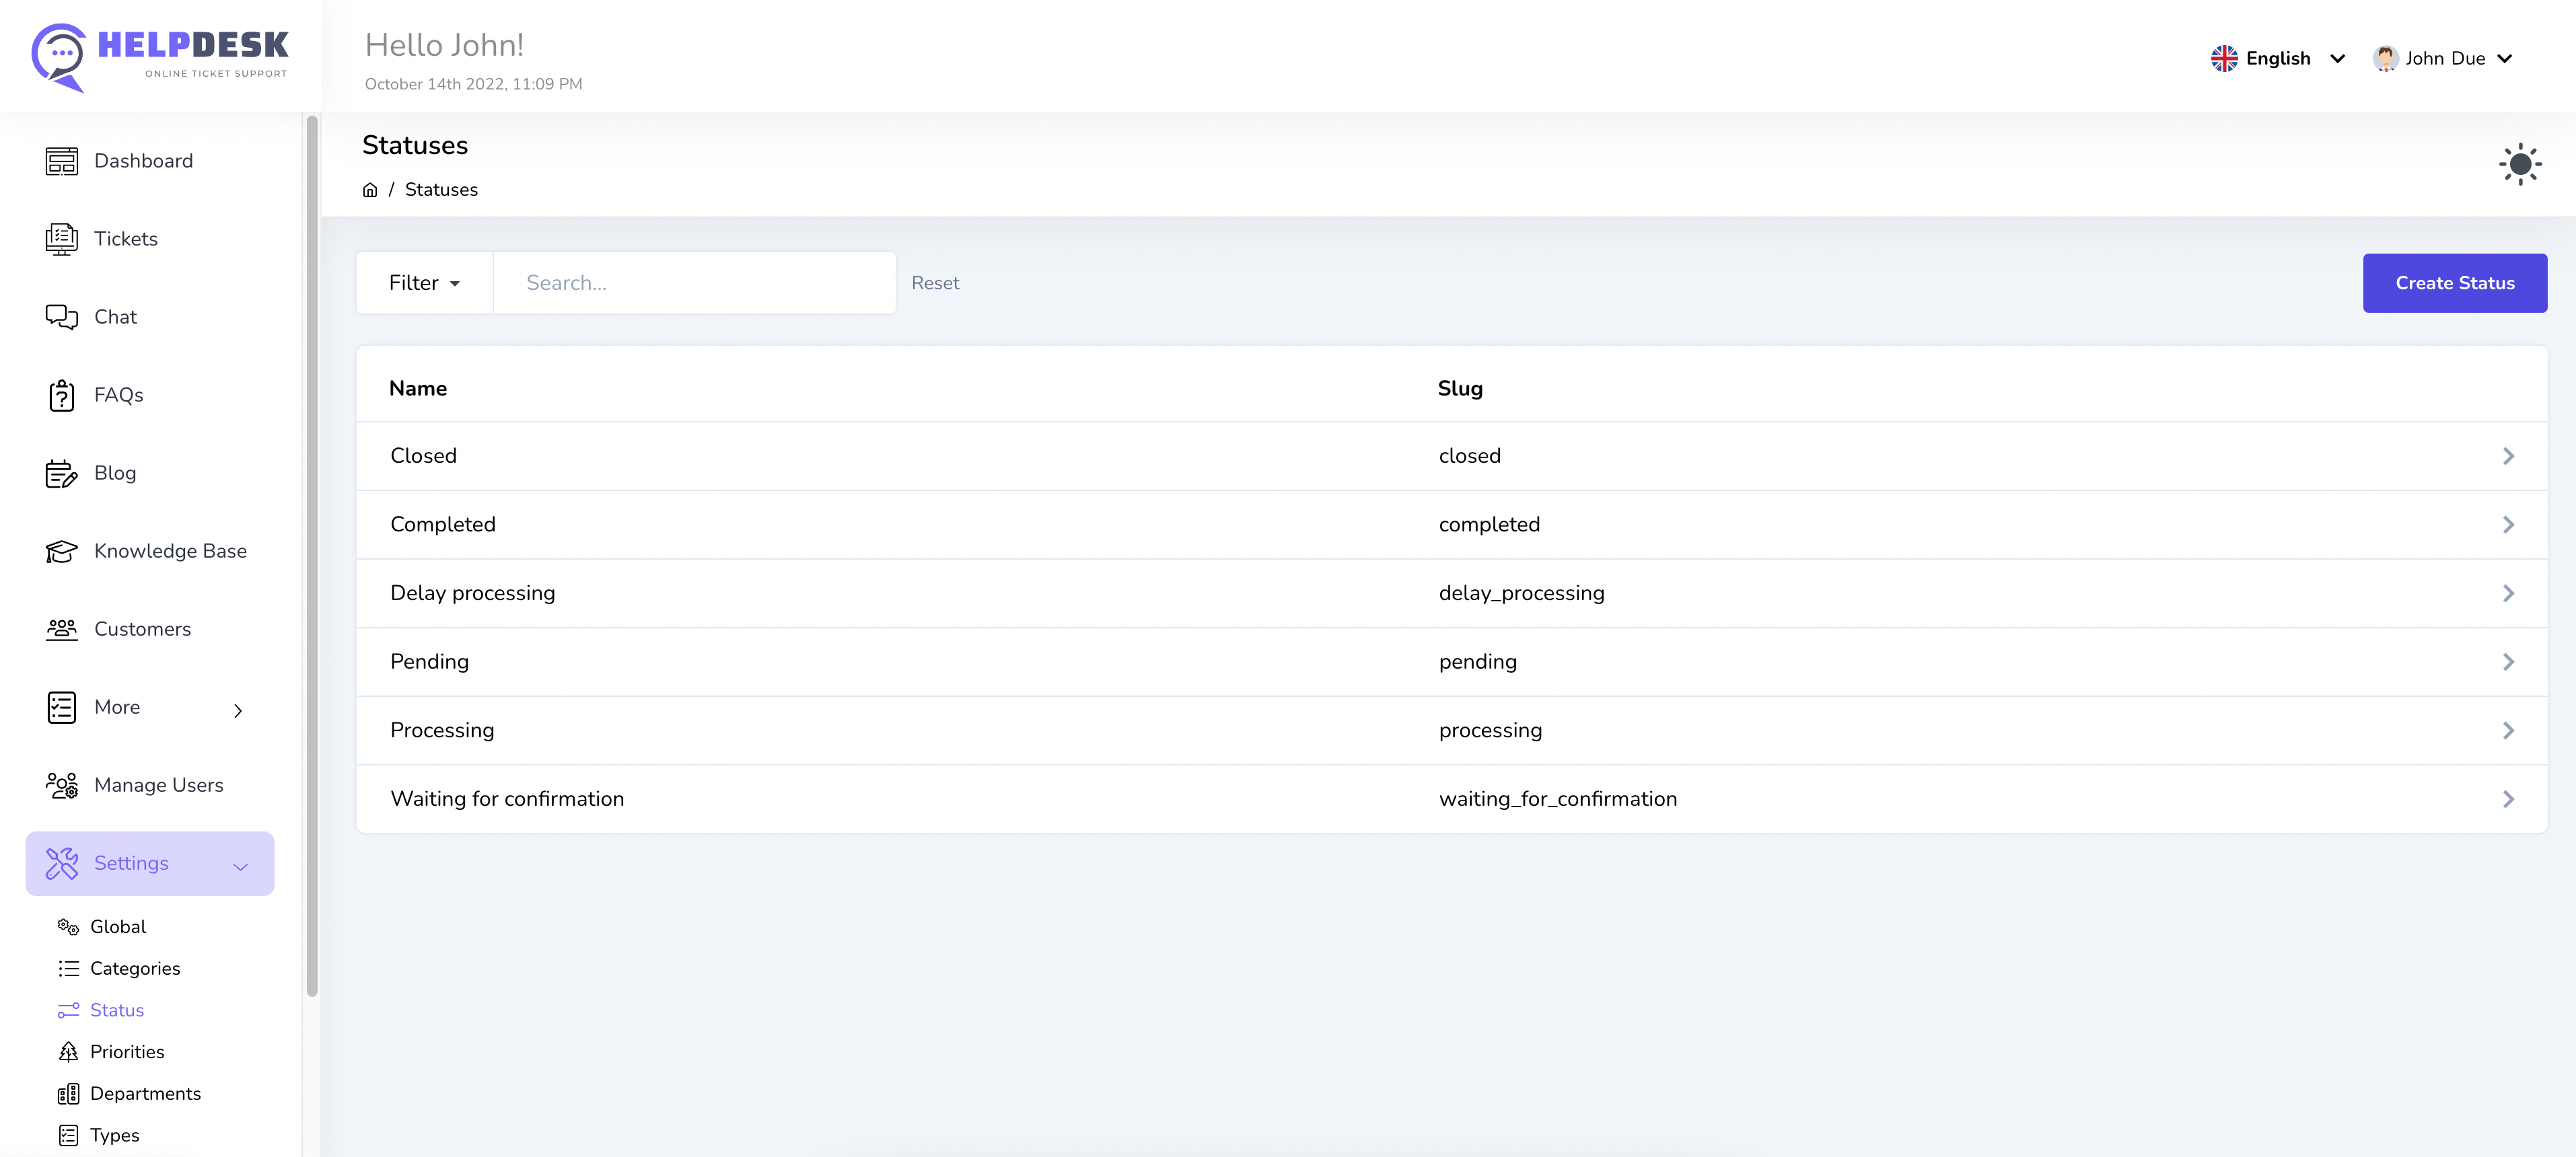
If you click on the particular status, you would be able to update/delete easily. Also, clicking Create Status button will go to the new page to create a new status item.
Priorities
Priority names are use to prioritize the ticket. There are some predefined priorities to set priority for your tickets. You can set/update your own priorities if you want to.
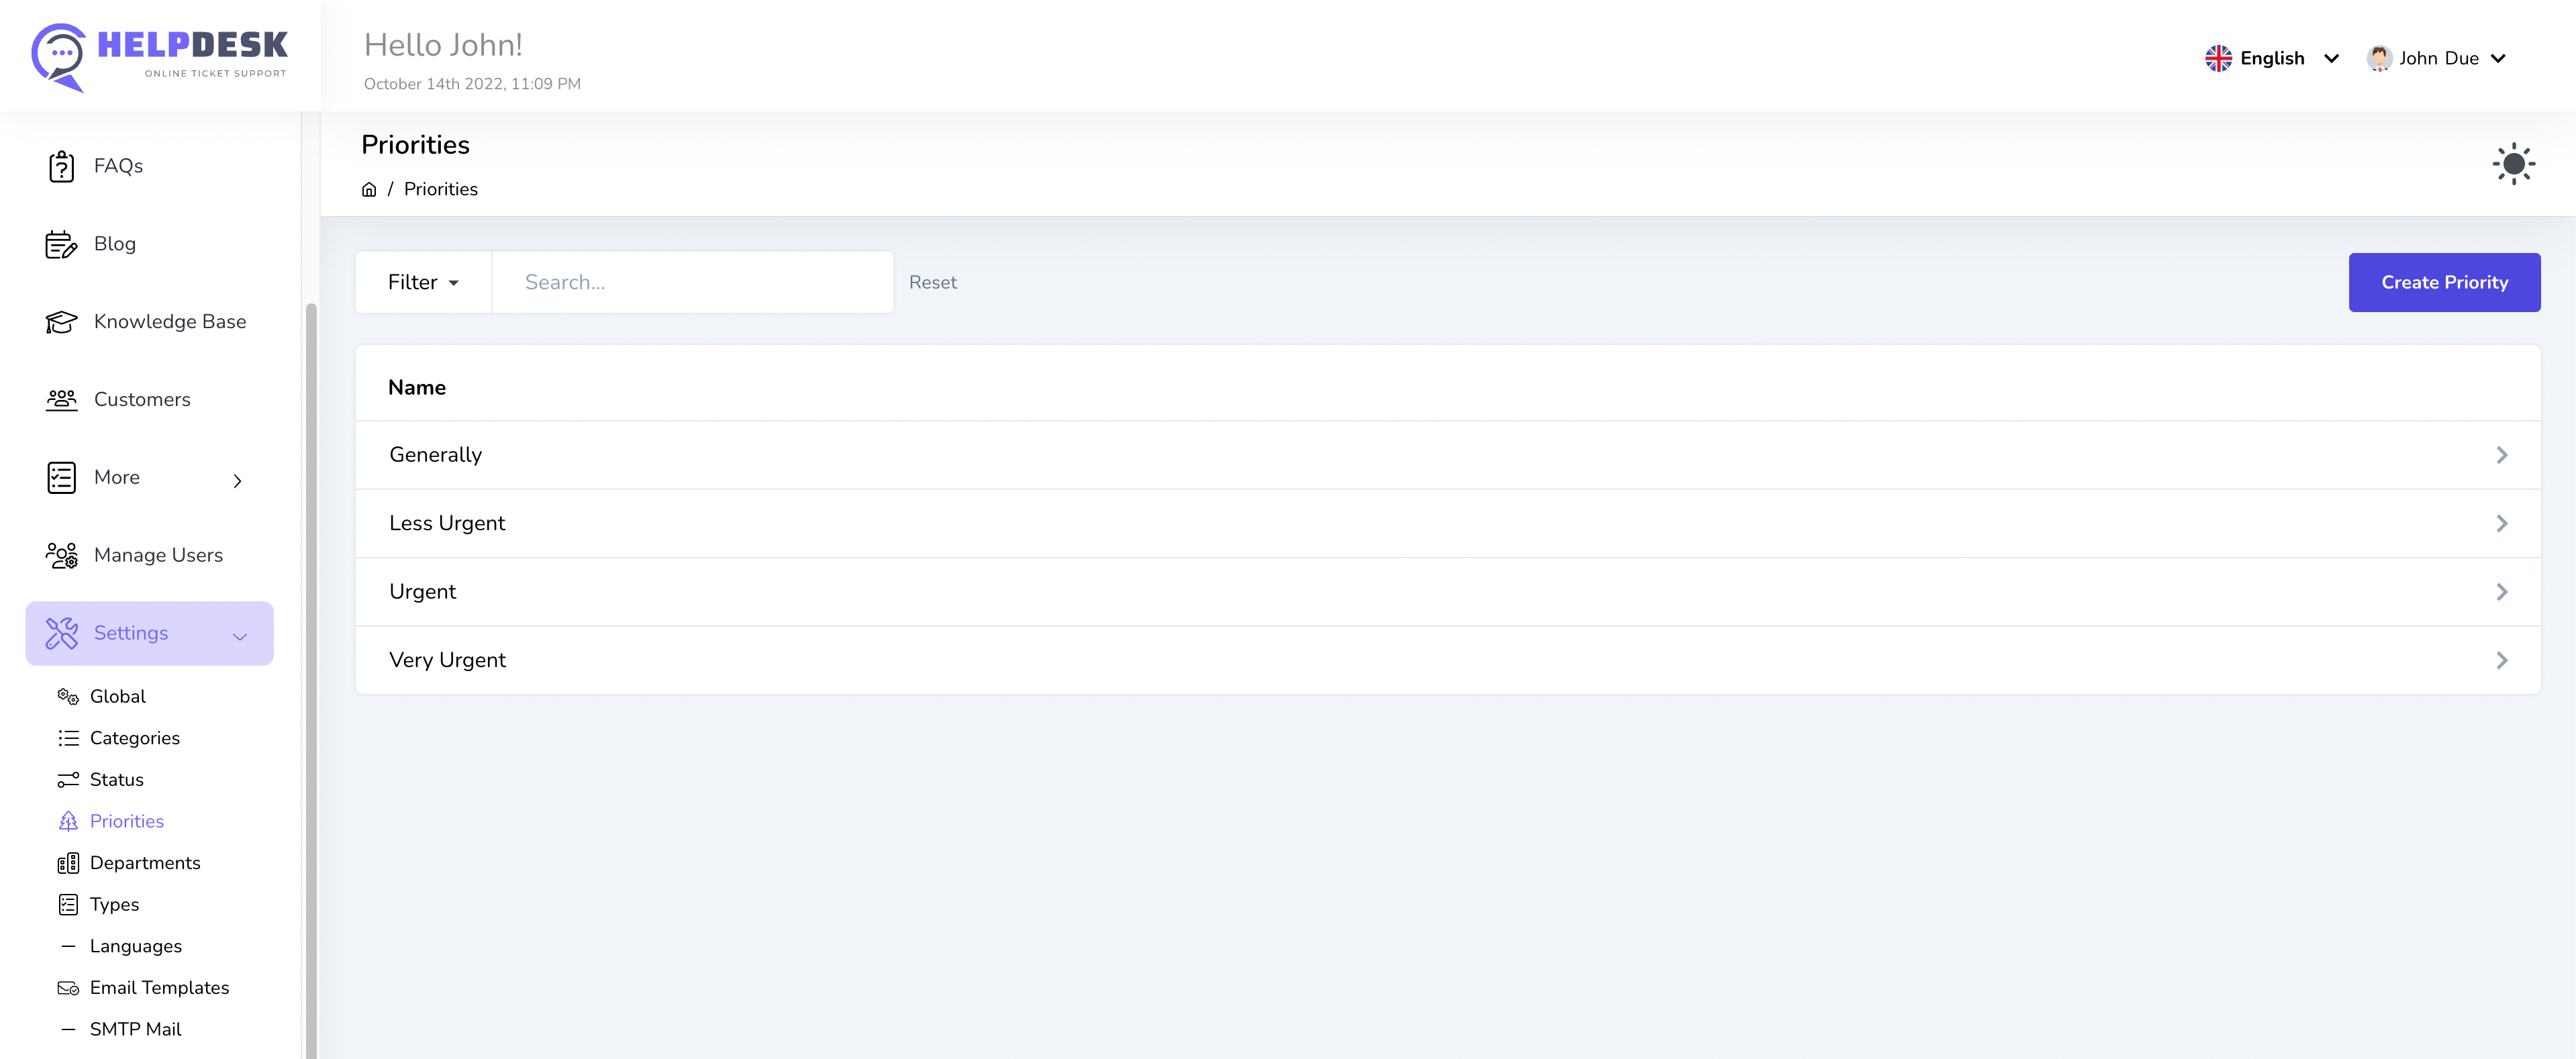
You can easily manage priorities from the page as defined on the above screenshot. Clicking a particular priority item will go to an another page to modify/delete that existing priority.
Departments
Departments are use to identify in which section the ticket will go. You will see some default departments as dummy items. But you can easily remote those or add new departments as per your requirements. Clicking on a particular department will go to the details page. From that page, you would be able to delete/update departments easily.
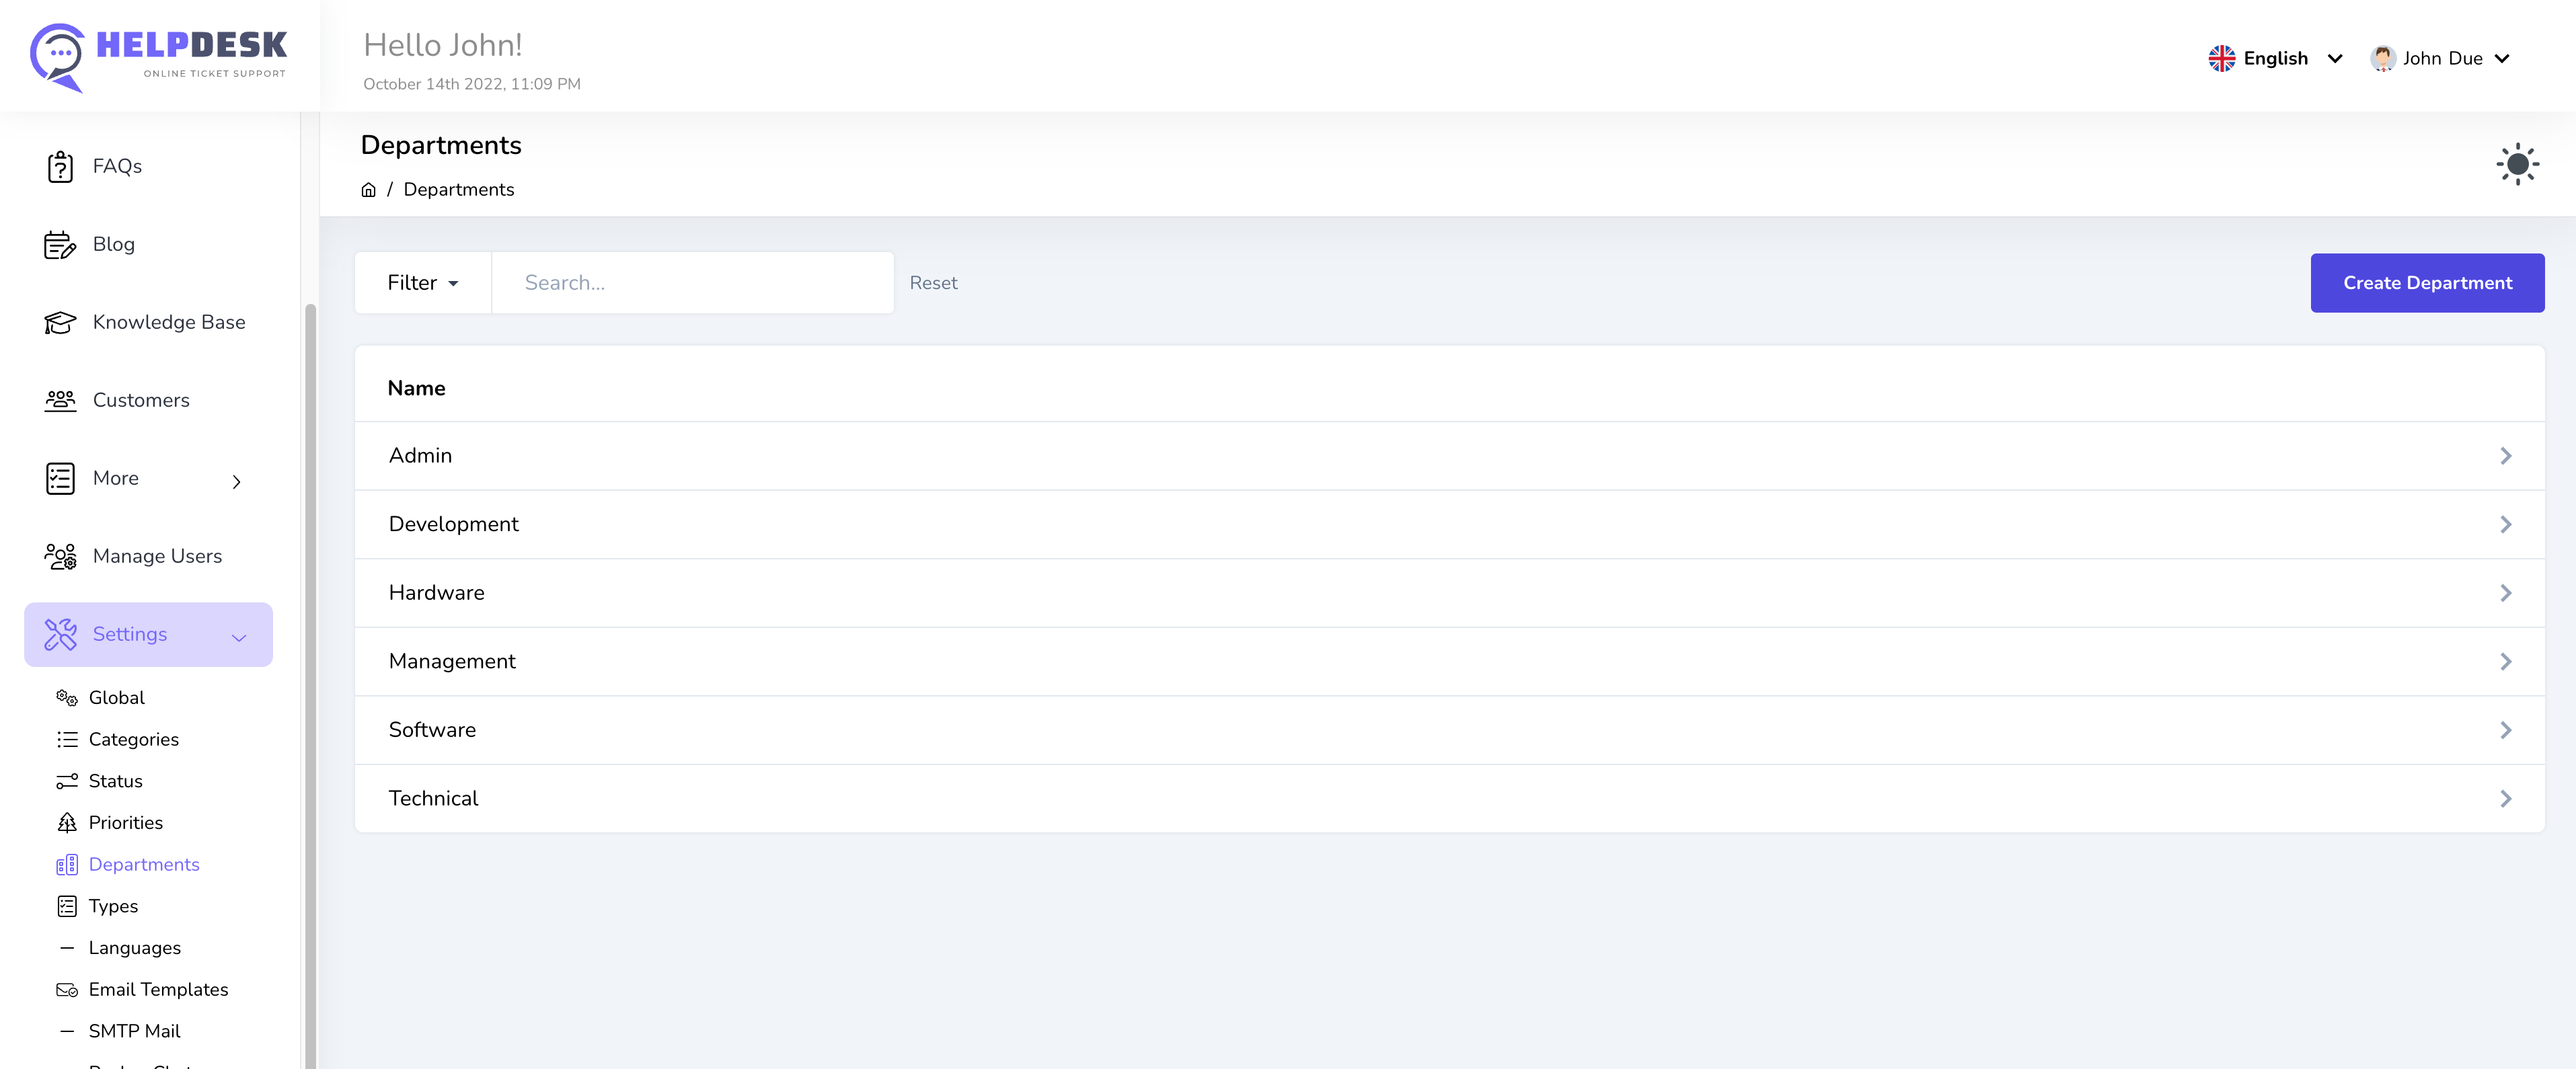
You can easily manage departments from the page as defined on the above screenshot.
Types
Types are define the ticket like which type of ticket it is. You will see some default ticket types after install this HelpDesk script. If you want to add more types, you can easily add with clicking Create New button.
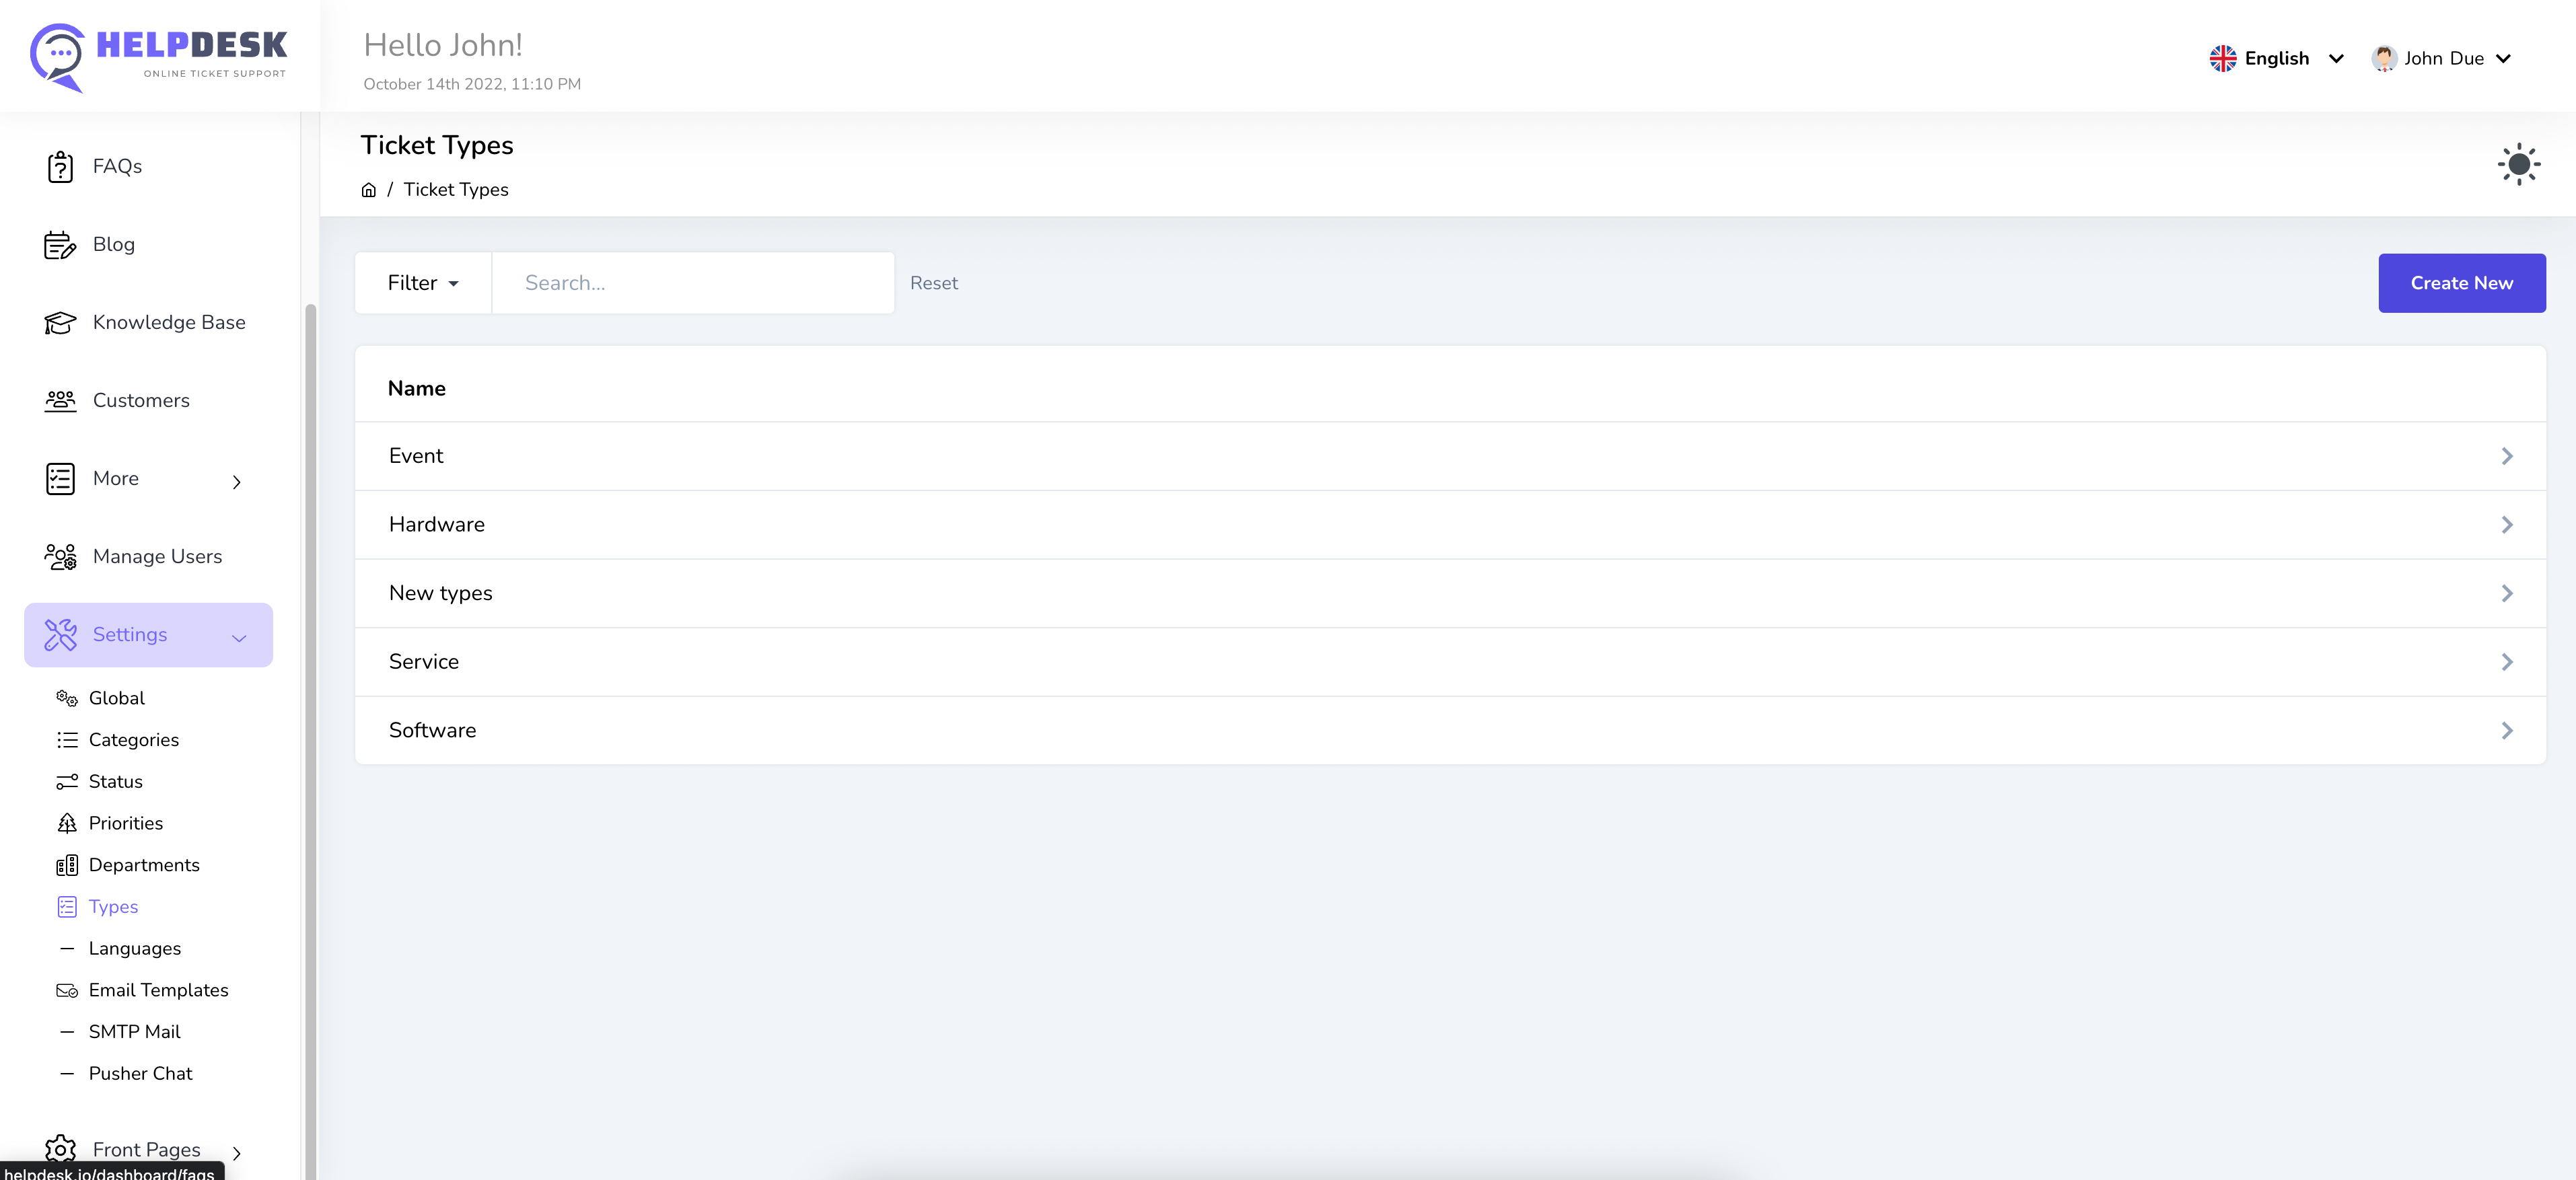
You can easily manage types from the page as defined on the above screenshot.
Languages
You can translate your app content with your preferred language. You will see all of the languages that available for this HelpDesk script. If you click on a particular language item you will see a details page with listing all of the word translations. You can easily customize the words as per your desire words. You must click the save button after update the language.
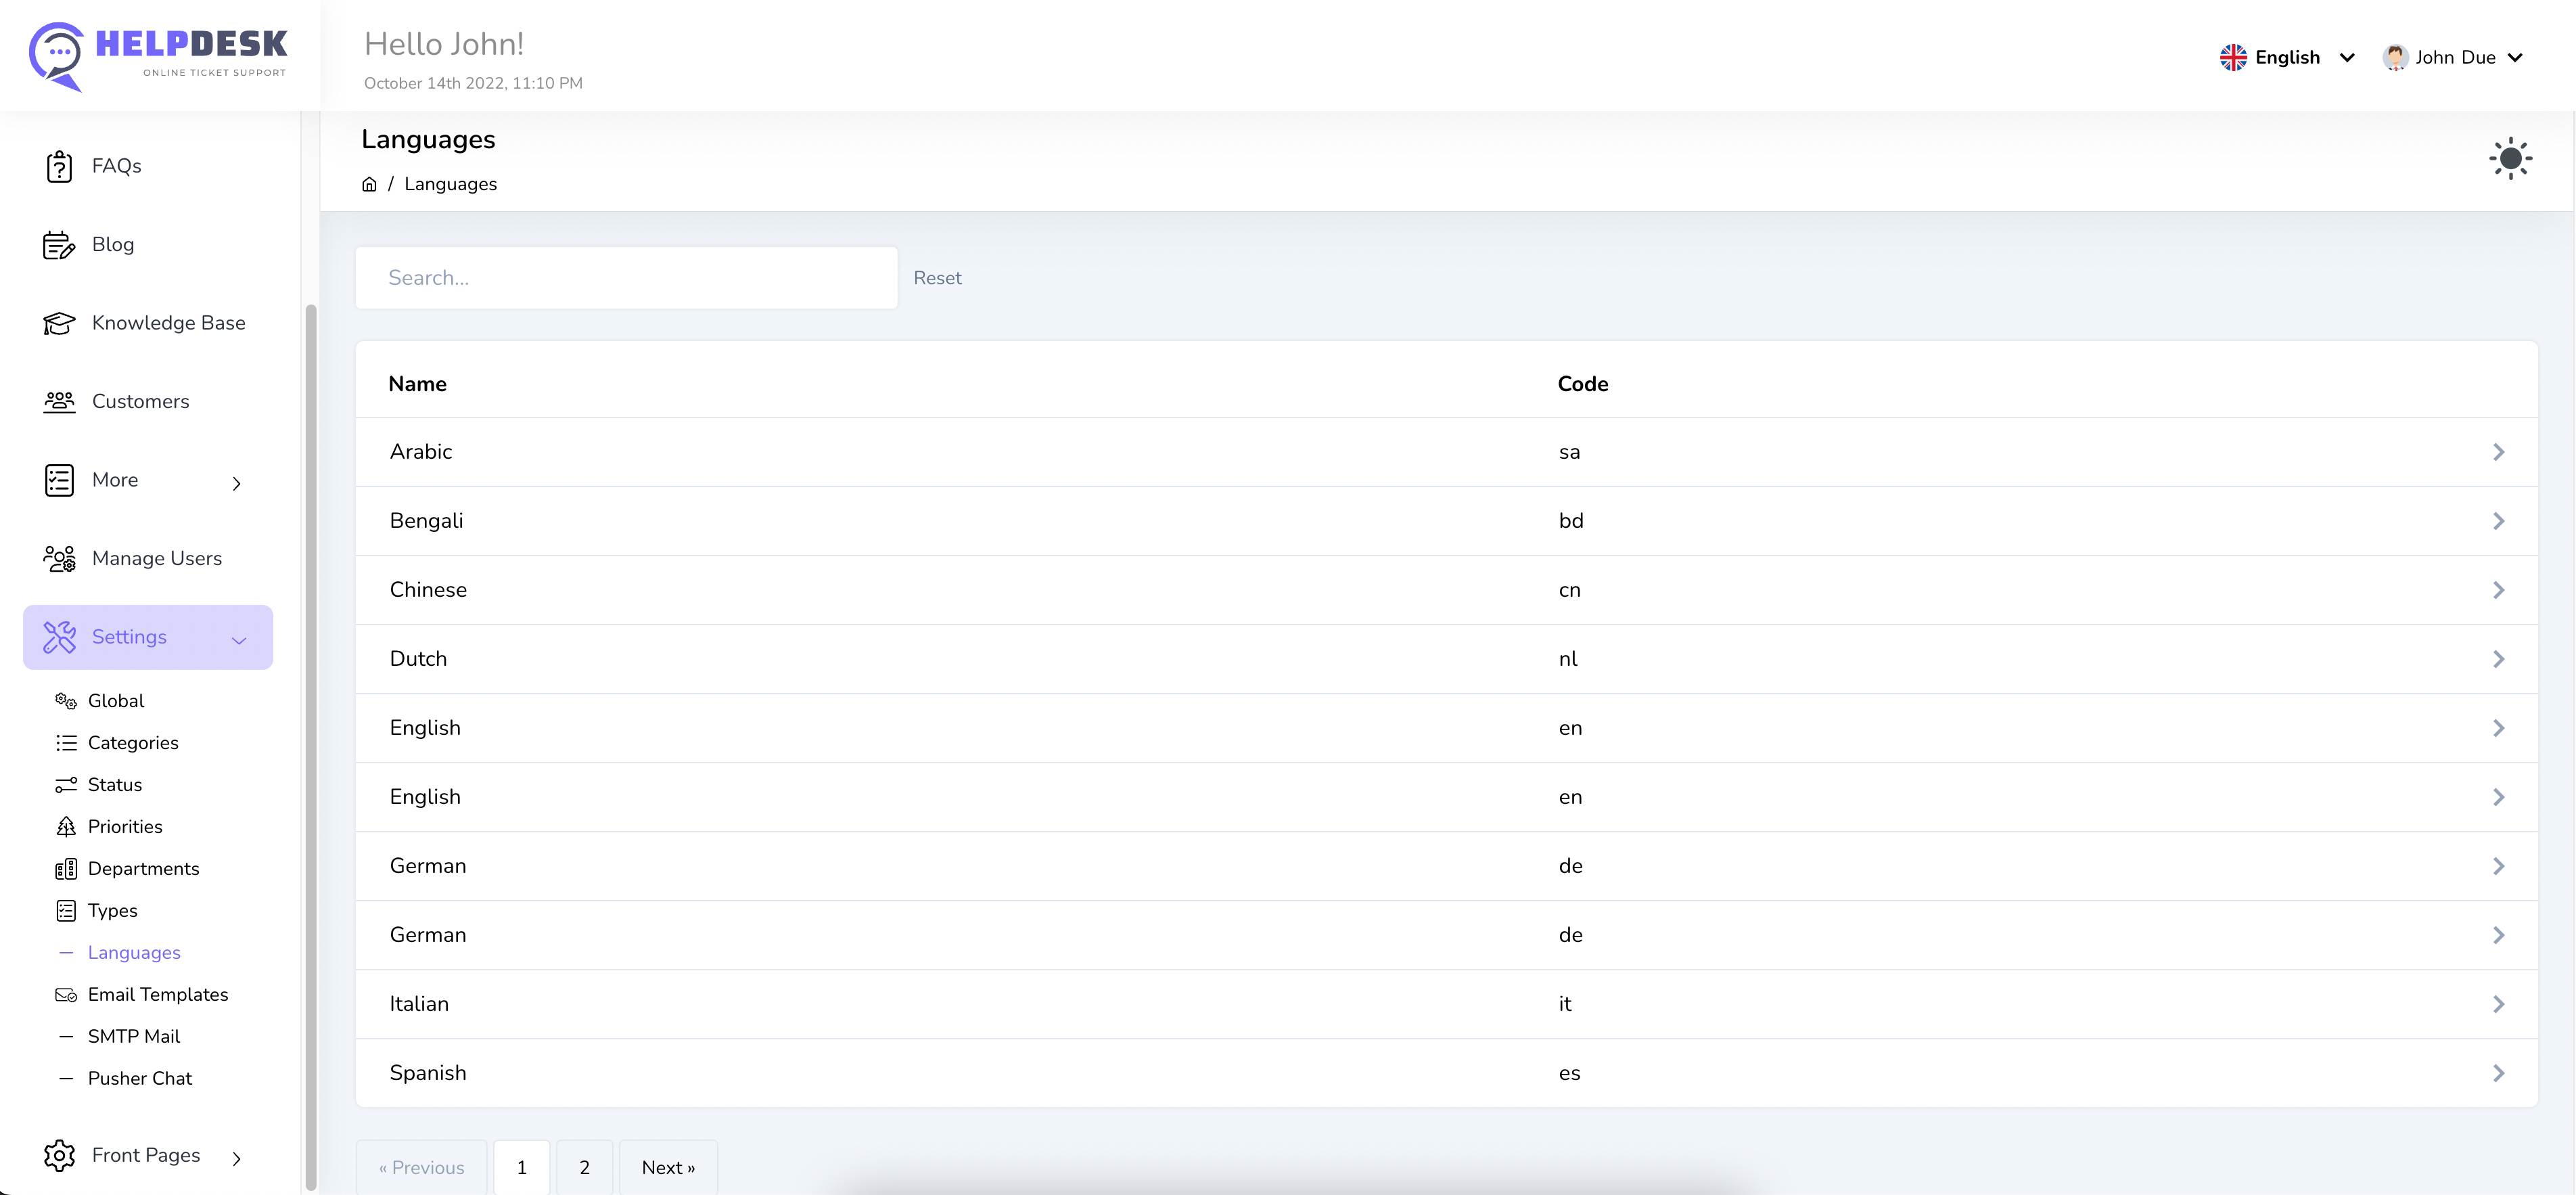
You can easily manage languages from the page as defined on the above screenshot.
If you click on a language item you will see the details page where defined all words you need to convert on your language. Just change update that so that it will effect when you change from the top bar
Email Templates
The email templates are the design for particular email you receive for the tickets or actions. There are some email template exist for the particular email. If you want to modify some information, you would be able to do that easily which clicking on the particular email template design details.
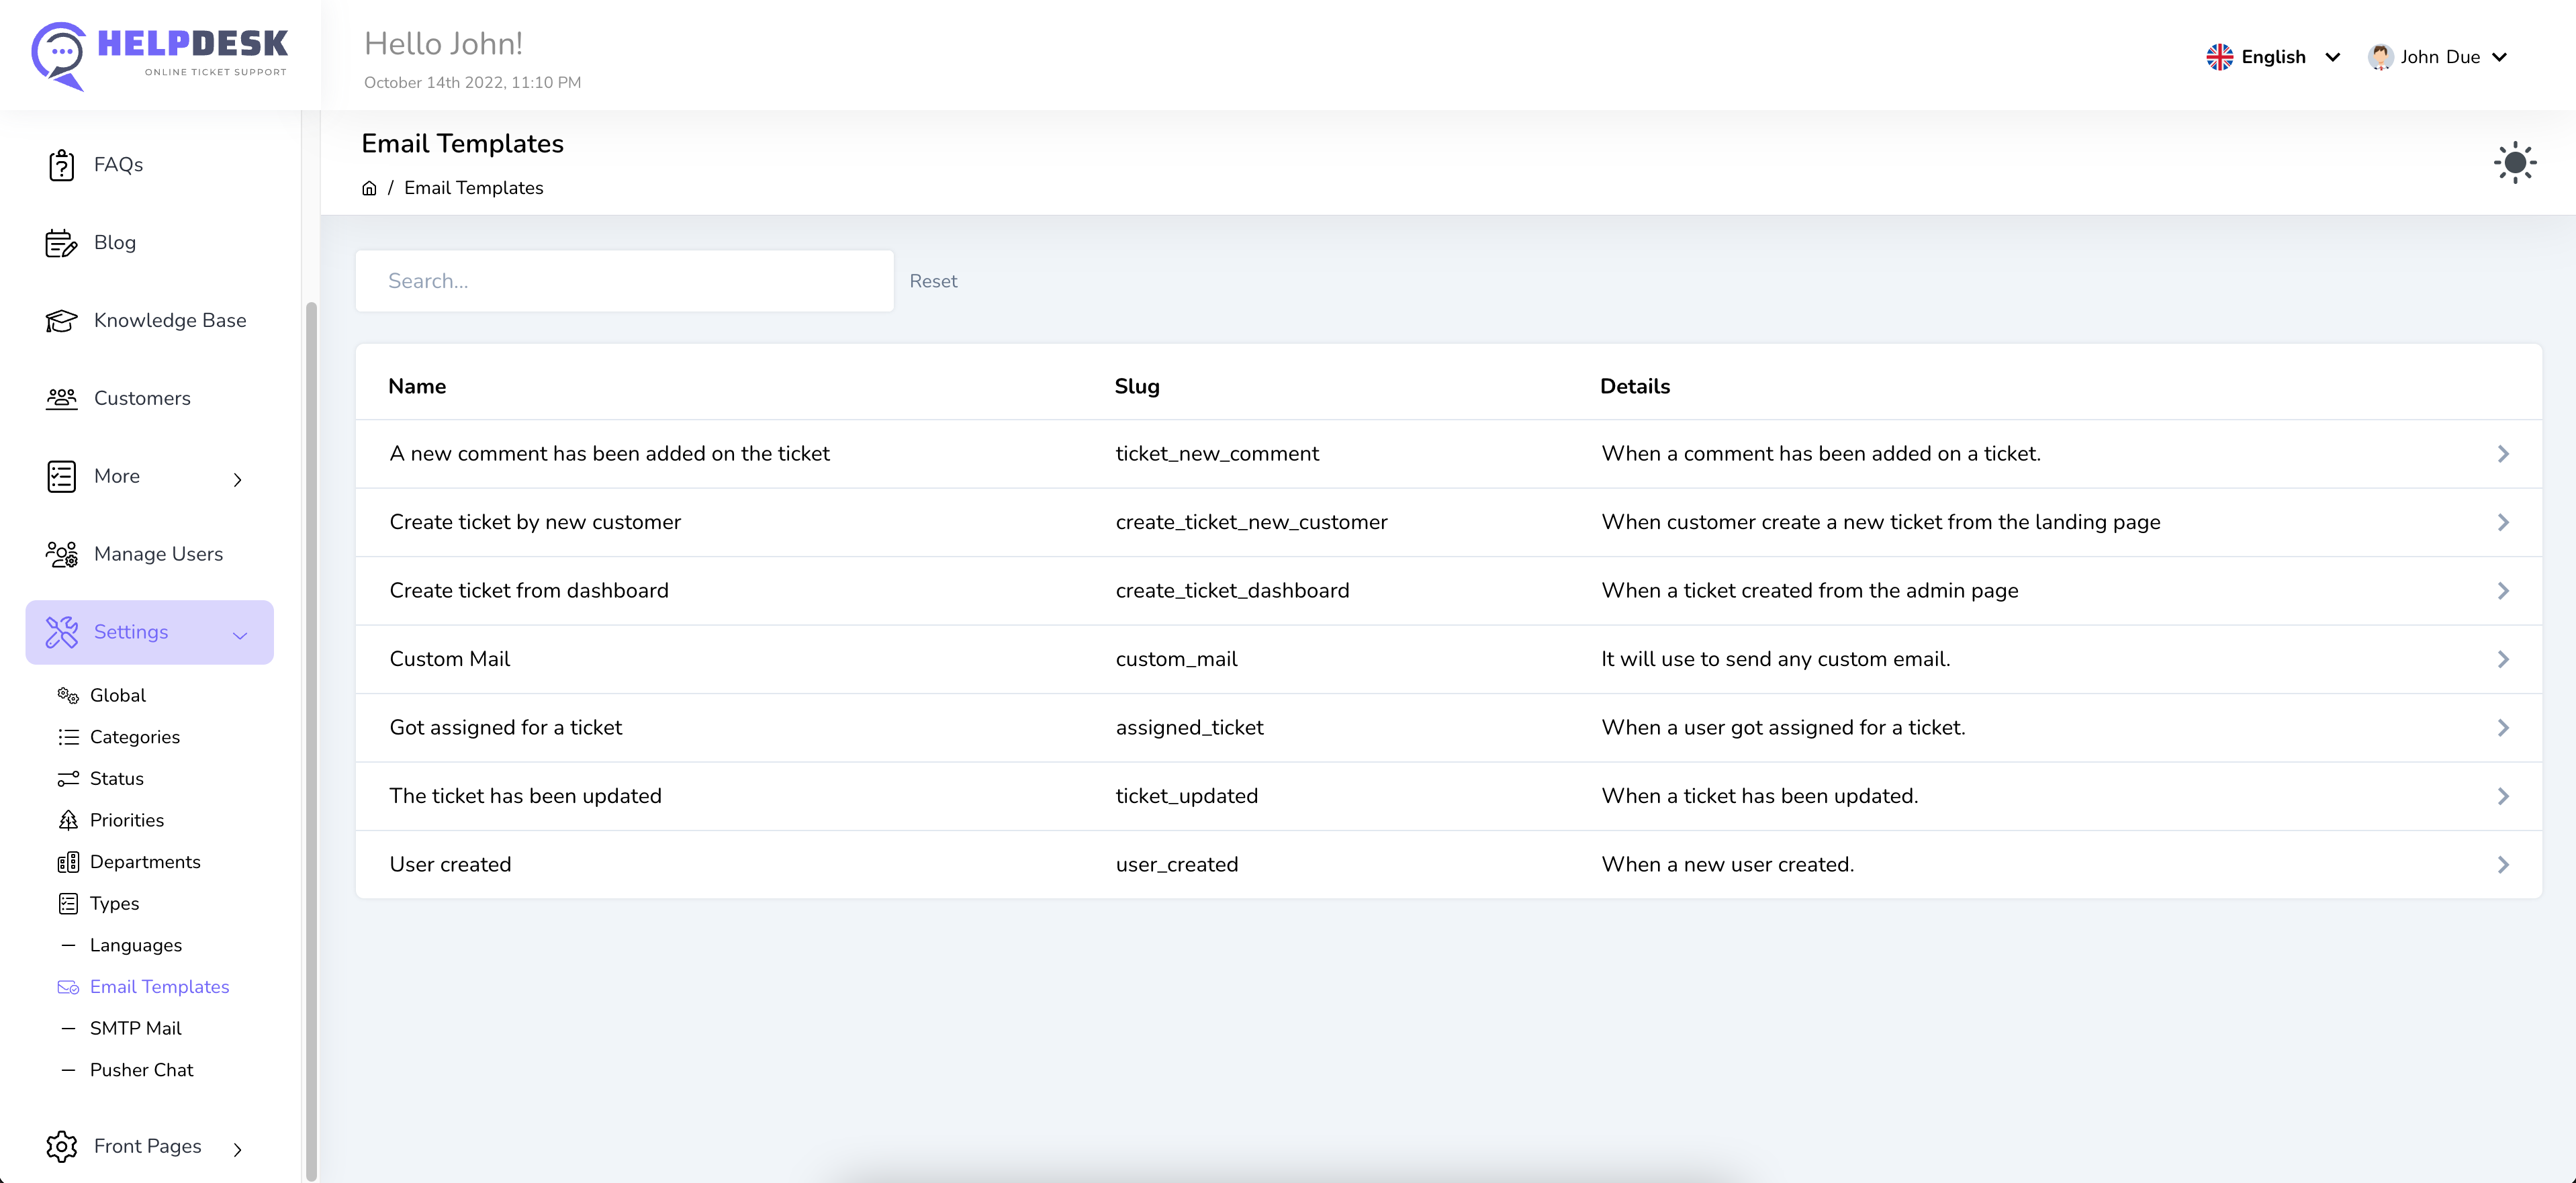
It's just a listing email template page. You will have click on those particular template item to see the details page with applied some design.
SMTP Settings
It's an important setup that you need to configure as per your mail information.
Mail / SMTP configuration will use to sending email to the recipients. You can use any SMTP server like your hosting email’s info, Gmail SMTP info, etc. The following is an example link about how to get your hosting email account configuration.
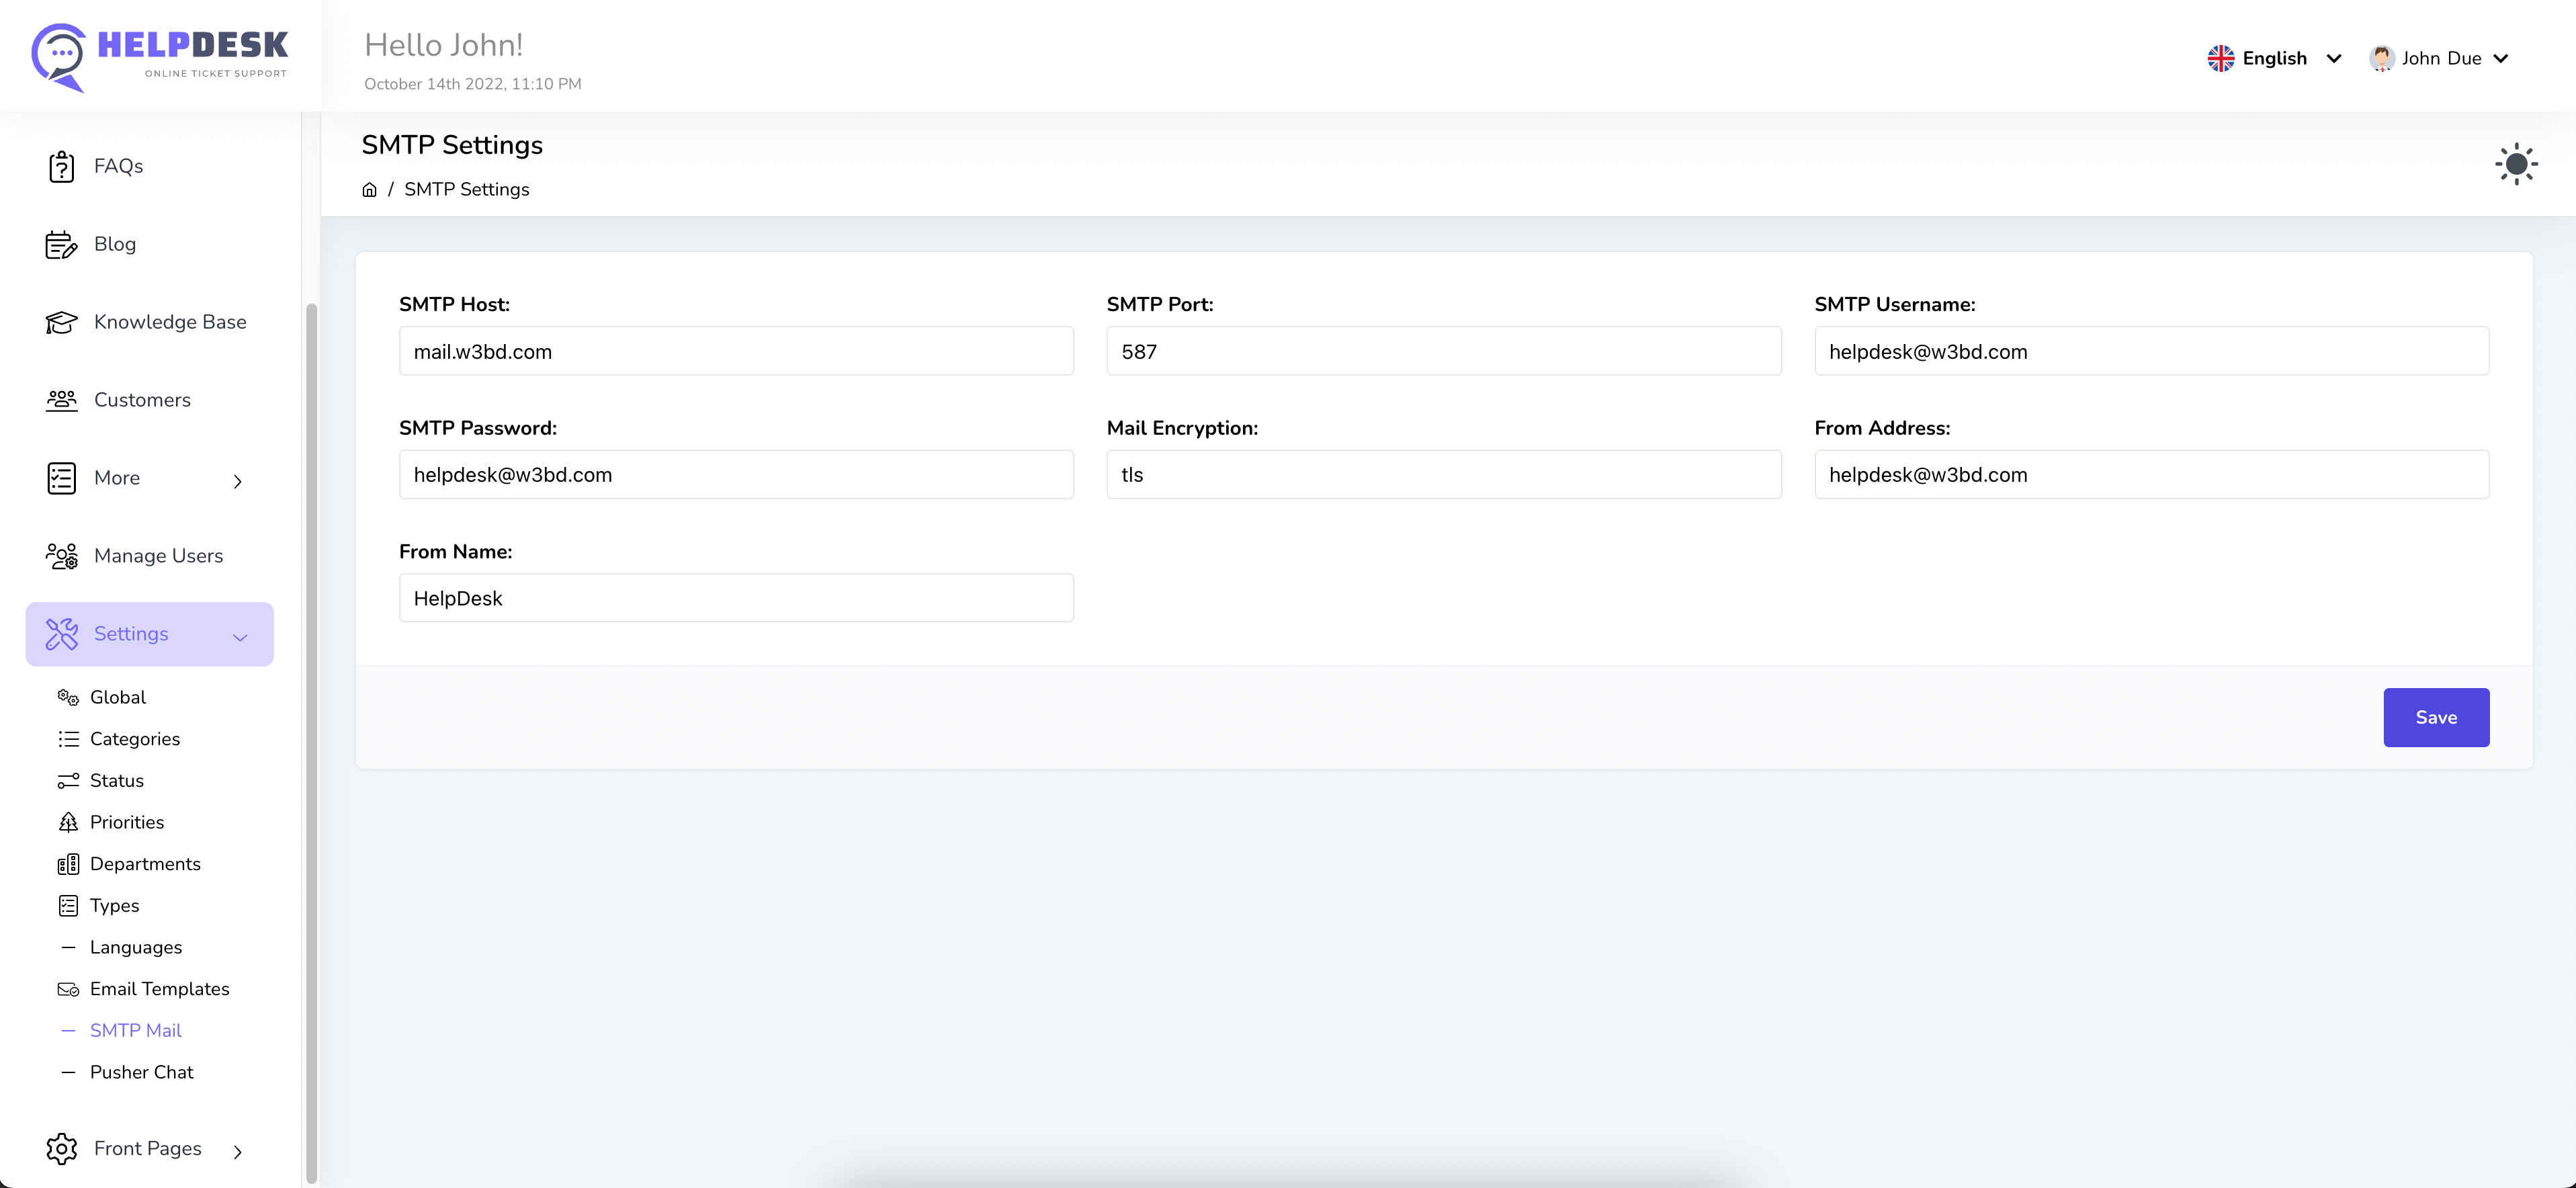
If you can't find your site's internal email configuration just ask your hosting provider regarding that. They will help you to find out your email SMTP configurations
Pusher Settings
You must setup pusher if you want to active the live chat. If you set pusher previously you don't need to do anything here. But if you didn't setup pusher while installation you need to setup that from here.
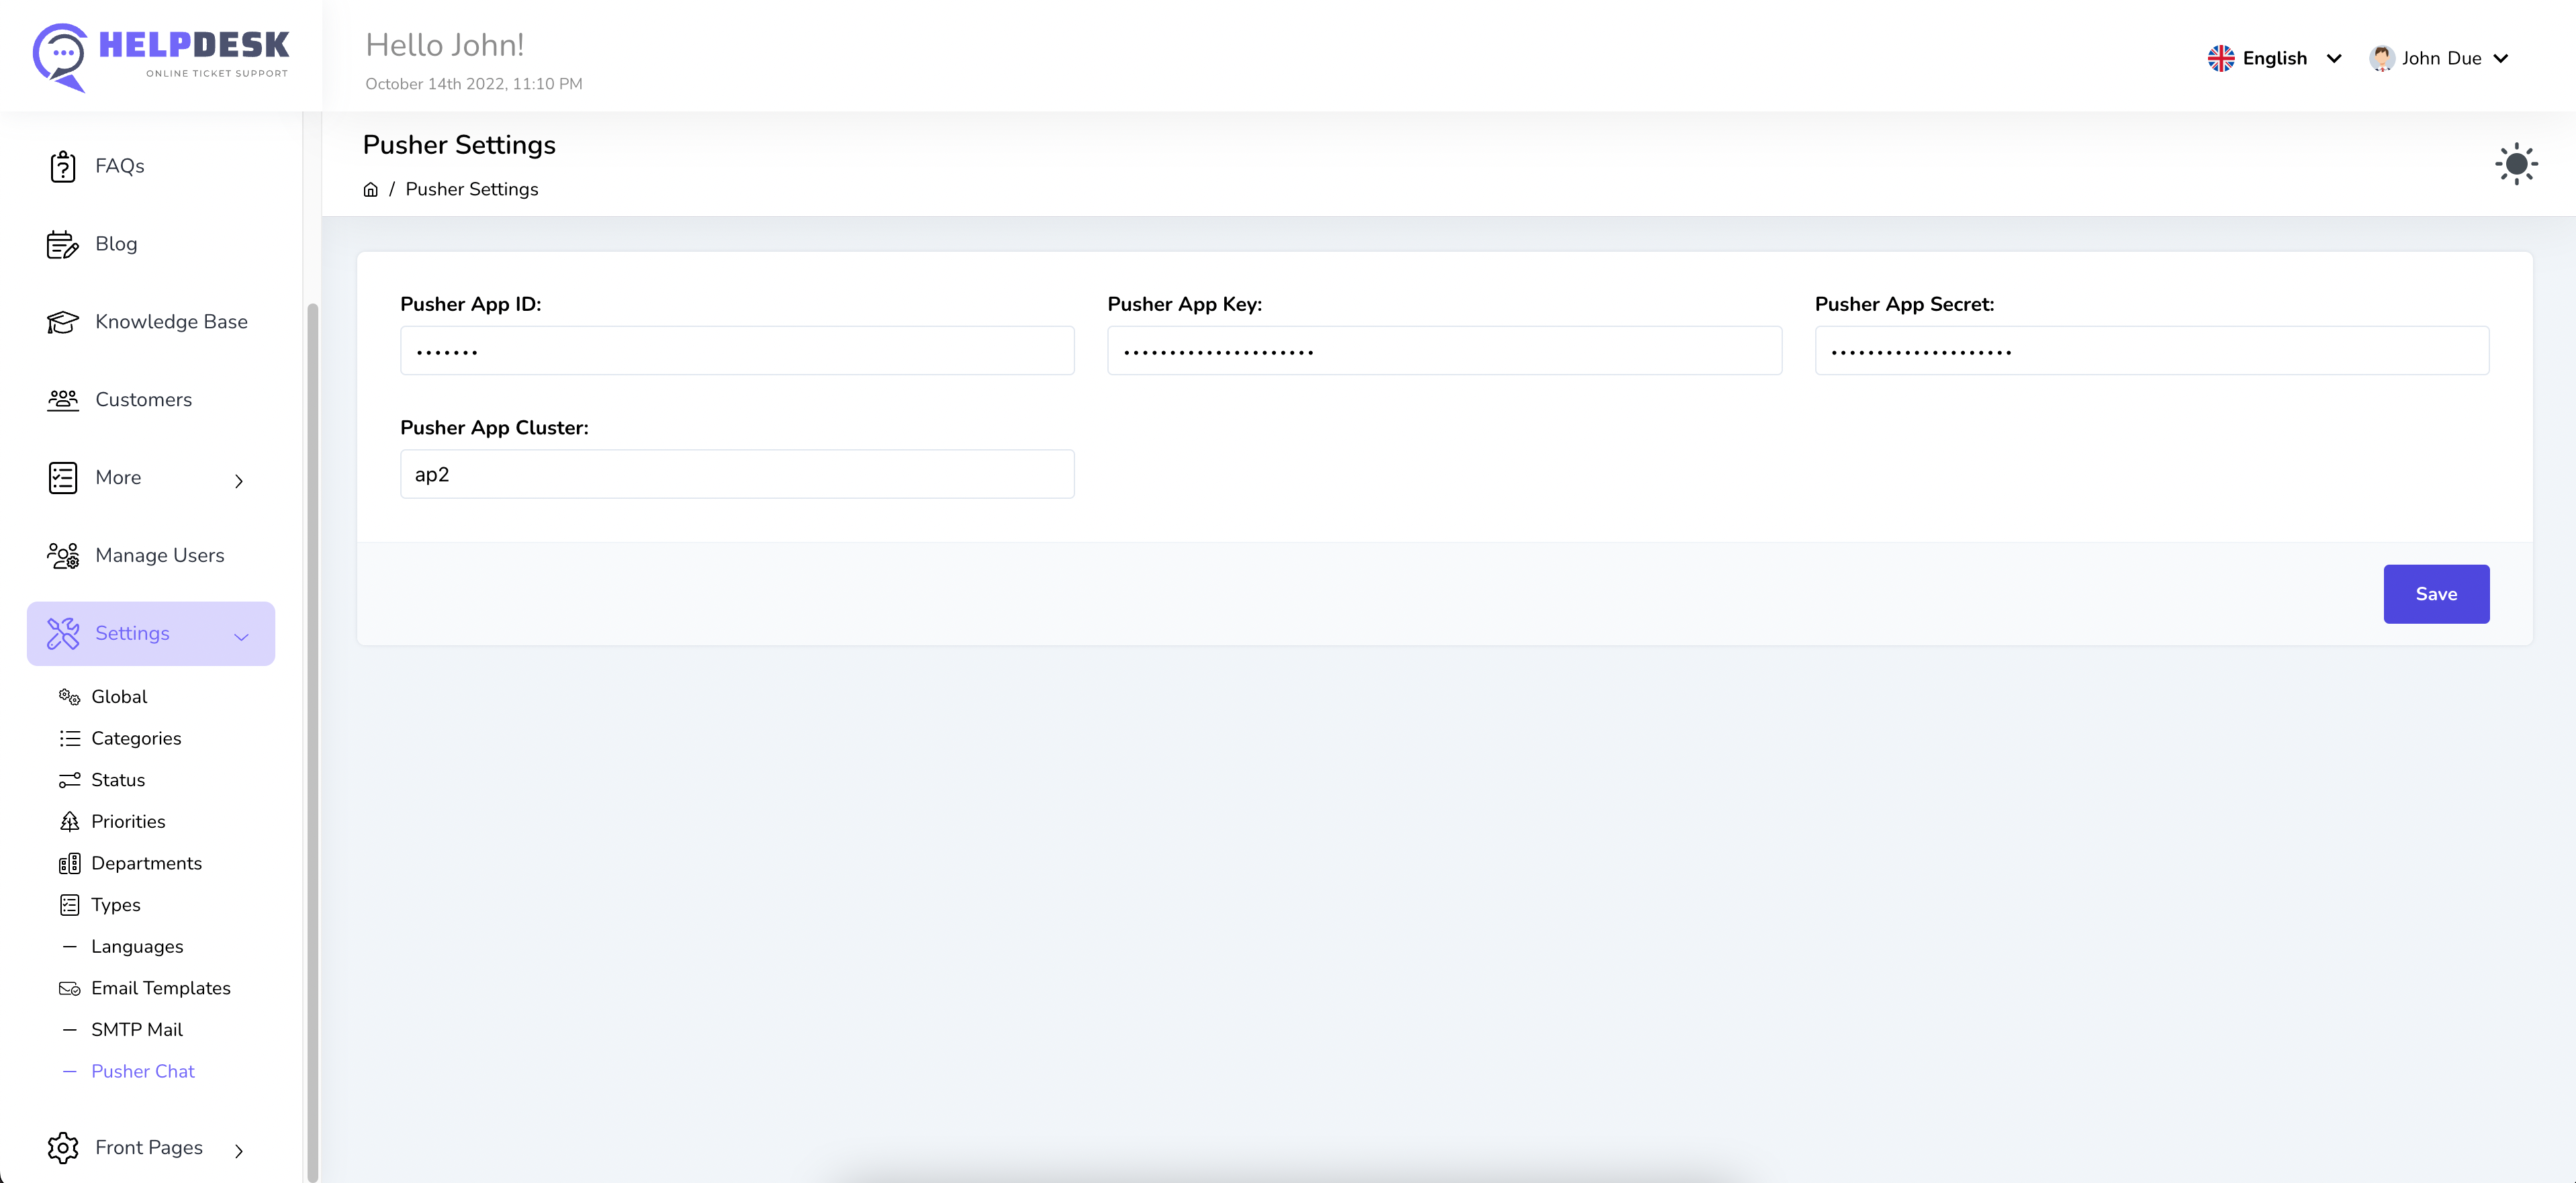
First, you need to register on the pusher.com website. After register on the pusher website you will find a button to create channel. You need to create a channel from there. After channel creation you will find api keys and need to setup those keys as above screenshot.
A video tutorial about how to setup pusher for HelpDesk.